How to make a knife from a circular saw blade with your own hands?

A handicraft knife from a circular saw blade, a hacksaw blade for wood or from a saw for metal will serve for many years, regardless of the conditions of use and storage. Let's talk about how to make a knife from factory-made steel elements, what is required for this and what needs to be paid close attention to. We will also tell you how to make artisanal cutters for wood carving lovers.

Working tools and materials
The raw material for creating a handicraft knife can be any used or new cutting component made of hardened steel. In the role of a semi-finished product, it is advisable to use saw wheels for metal, for concrete, saw wheels for pendulum end saws and hand saws. Decent material would be a used gasoline saw. It is possible to forge and make a blade from its chain, which in its properties and appearance will be no worse than the legendary Damascus blades.
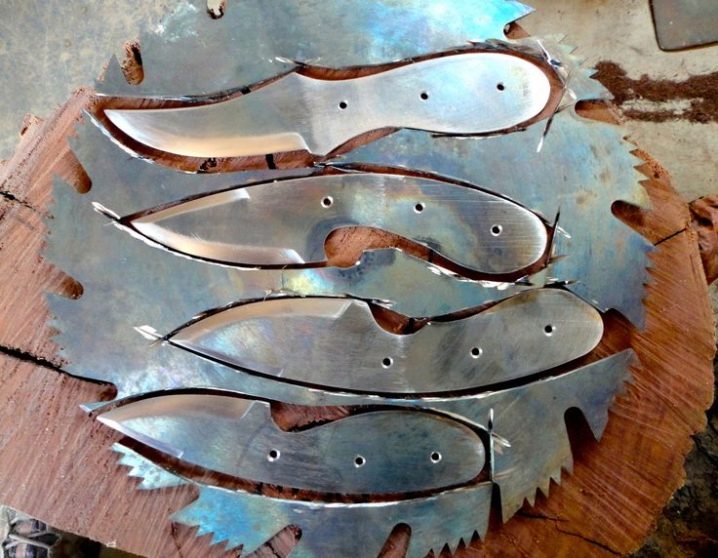
To create a knife from a circular disc with your own hands, the following equipment and materials will become necessary:
- angle grinder;
- emery machine;
- electric drill;
- ruler;
- hammer;
- sandpaper;
- sharpening blocks;
- files;
- center punch;
- epoxy;
- copper wire;
- felt-tip pen;
- container with water.


Additionally, you need to consider the question with the pen. The manufactured item should fit comfortably in the palm of your hand.
To create a handle, it is preferable to use:
- non-ferrous alloys (silver, brass, bronze, copper);
- wood (birch, alder, oak);
- plexiglass (polycarbonate, plexiglass).
The material for the handle must be solid, without cracking, rotting and other flaws.


Metal handling techniques
To keep the blade strong and tight in the course of its creation, it is required to adhere to the rules for handling iron.
- The semi-finished product should not have noticeable and unexpressed defects. Before starting work, the blanks need to be examined and tapped. A holistic element sounds sonorous, and a defective element is muffled.
- When creating a project and drawing of the cutter configuration, avoid corners. In such areas, steel can break. All transitions must be smooth, without sharp turns. The bevels of the butt, guard and handle must be grinded off at an angle of 90 degrees.
- When cutting and processing, the metal must not be overheated. This leads to a decrease in strength. An overcooked blade becomes fragile or soft. During processing, the part must be regularly cooled, completely dipping it into a container of cold water.
- When creating a knife from a saw blade, you must not forget that this element has already passed the hardening procedure. Factory saws are designed to work with very tough alloys. If you do not overheat the product during milling and processing, it will not need to be hardened.


The tail of the blade does not need to be overly thin. After all, the main load will be applied specifically to this area of the knife.
Making a knife
If the saw blade is large and not very worn out, then it will be possible to make several blades of various purposes from it. The effort is worth it.
A knife from a circular circle is made in a specific order.
- A mold is placed on the disc, the outlines of the blade are outlined. Scratches or dotted lines are drawn on top of the marker with a center punch. After that, the picture will not disappear in the process of cutting out the part and adjusting it for the required configuration.
- We start cutting the blade. For this purpose, it is worth using an angle grinder with a disc for iron. It is necessary to cut with a margin of 2 millimeters from the line. This is necessary in order to then grind off the material burnt by an angle grinder. If you don't have an angle grinder at hand, then you can cut a rough part using a vise, a chisel and a hammer, or a hacksaw for metal.


- All unnecessary is removed on an emery machine. This should be done carefully and slowly, trying not to overheat the metal. To prevent this from happening, the part must be periodically dipped in water until it is completely cooled.
- Getting closer to the contour of the future blade, you need to be more careful so as not to lose the shape of the knife, not to burn it and maintain an angle of 20 degrees.
- All flat areas are smoothed. This can be done handily by placing the part against the side of the emery stone. The transitions are rounded.
- The workpiece is cleaned of burrs. The cutting blade is being ground and polished. For this, several different stones are used on an emery machine.


Blade hardening
Turn on the largest burner on your gas stove to the maximum. This is not enough to heat the blade to 800 degrees Celsius, so in addition use a blowtorch. This heating will demagnetize the part. Keep in mind that the hardening temperature is different for different types of steel.
After the part heats up to such an extent that the magnet stops sticking to it, keep it in the heat for another minute to make sure that it warms up evenly. Dip the part in sunflower oil, heated to about 55 degrees, for 60 seconds.
Wipe off the oil from the blade and place it in an oven at 275 degrees for one hour. The part will darken in the process, but 120 grit sandpaper will handle it.


Making a pen
Separately, you need to focus on how the handle is made. If wood is used, then a single piece is taken in which a longitudinal cut and through holes are made. Then the bolt is strung onto the blade, the holes for the fasteners are marked in it. The handle is fixed to the blade by means of screws and nuts. In the version with screw mounting, the hardware heads are recessed in the wood structure and filled with epoxy.
When the handle is assembled from plastic, 2 symmetrical plates are used. We form the outline of the handle. Armed with files of various grain sizes, we begin to form the contour of the handle. Reduce the roughness little by little as you create it. In the end, instead of a file, sandpaper comes for support. By means of its handle, the handle is completely formed, it must be made completely smooth. Finish with 600 grit sandpaper.
The knife is almost ready. We saturate the handle (if it is wooden) with linseed oil or similar solutions to protect it from dampness.


Knife sharpening
If you want a really sharp knife, use water stone for sharpening. As in the variant with grinding, the coarseness of the water stone must be gradually reduced, bringing the canvas to perfection. Do not forget to constantly wet the stone so that it is cleaned of iron dust.


How to create homemade wood carving cutters
Wood chisels are hand tools used for artistic wood carving, the cost of which is not affordable for everyone.As a result, many have a desire to make them on their own.
The cutter has in its structure a cutting steel component and a wooden handle. To make such a knife, you need an elementary set of tools.
Tools and fixtures:
- emery machine;
- angle grinder for cutting blanks;
- jigsaw;
- circular cutter;
- sandpaper.


In addition, you will need the material itself, in particular - carbon or alloy steel to create a cutting tool.
Source materials:
- round block of wood with a 25 mm cross-section;
- a strip of steel (0.6-0.8 mm thick);
- drills (for thread);
- discs for a circular cutter.


An abrasive disc is also a consumable, through which the cutter will be ground. Used circular discs are useful as a key material for creating incisors.
Step-by-step guide to creating a wood pick
Creation of semi-finished products for a cutter blade
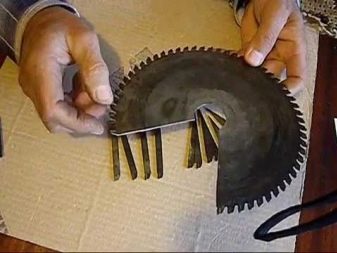
Elements for the cutter blade are made from a used circular disc. To do this, the disc is cut according to the marking by means of an angle grinder into several rectangular strips of approximately 20x80 millimeters in size. Each strip is a cutter in the future.

Shaping the main incisors
Each cutter needs to be machined to the required configuration. The process can be implemented in 2 ways: by sharpening on a machine and forging. Forging is necessary to create a deflection, and turning is necessary to form a uniform blade configuration.
Sharpening
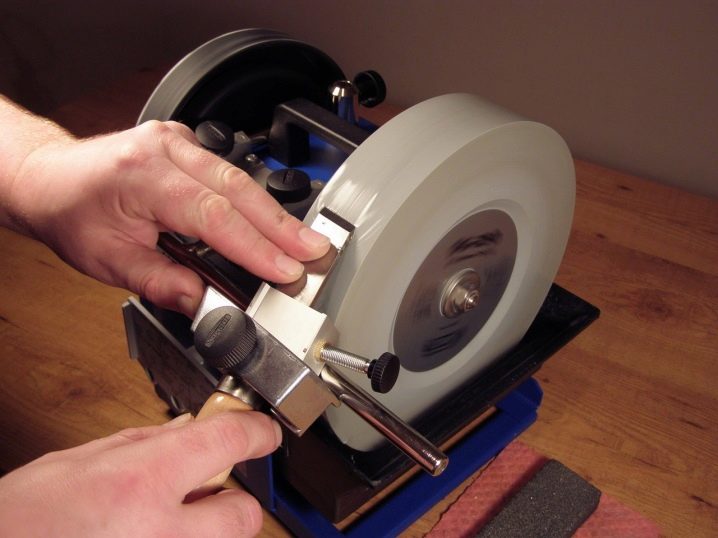
To sharpen the blade, you need an emery machine with a small grit stone. Sharpening is performed at an inclination of approximately 45 degrees, and the length of the pointed part is somewhere between 20-35 millimeters, taking into account the total length of the cutter. The blade itself can be sharpened both by hand and on a rig.
Creating a handle for comfortable carving
To make the use of the tool extremely comfortable, you will need to make a wooden handle. The handle is carried out on special equipment or by hand, by planing and subsequent grinding with sandpaper.

Docking the blade with the handle
The steel blade is inserted inside the wood handle. To do this, a hole is drilled inside the handle to a depth of 20-30 millimeters. The blade of the cutter will be on the outside, and the base itself is hammered into the cavity of the handle.
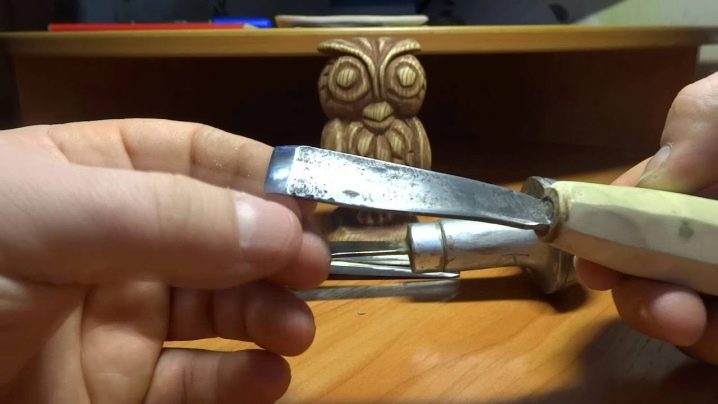
It should be noted that for reliable fixation, there must be a sharp point in the shape of a needle at the tip of the steel part. When hammering, it is necessary to use a pad made of dense fabric so as not to disturb the sharpening of the blade.
Mounting the crown
A steel retaining ring is placed in order to secure the blade. A specialized contour is cut on the wooden handle exactly to the size of the ring. Then a thread is cut and the crown ring itself is fixed on the already made thread. As a result, the wooden handle should be squeezed from all sides, and the blade should be firmly fixed in the "body" of the product.

Grinding the blade
For wood carving to be of the highest quality, you need to fine-tune the blade. For this, a fine whetstone or ordinary ceramics is used. A little oil is poured onto the plane of the blade (it is possible to use a motor oil), and then the cutter is sharpened at an angle of 90 degrees.
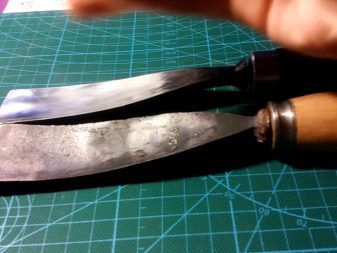

As a result, a sharp removed device will come out, and in the case of a successful sharpening, wood carving will become extremely light and comfortable.
For information on how to make a knife from a circular disc with your own hands, see the next video.


The comment was sent successfully.