Fastening timber to concrete
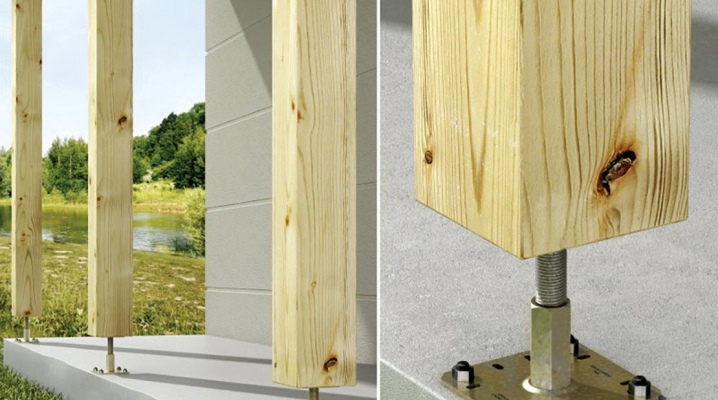
Modern dwellings are very often built from concrete blocks, which are not inferior to stone in their performance characteristics, but at the same time, a wooden beam must be fixed on top of the concrete surface for the lathing. This is not so easy to do, because it is necessary that the drilled concrete frame reliably holds the beams in the correct position. Considering that the coefficients of thermal expansion of 2 materials also differ, it is extremely important to observe the technology of their connection.

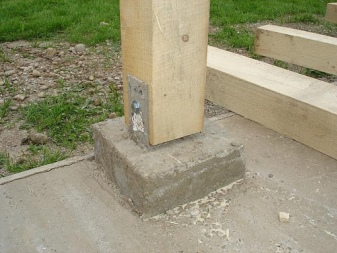
Installation features
Fastening a wooden beam to concrete is carried out in different ways, but anchors, metal brackets, dowels and other similar means are most often used as fasteners. The choice of a particular technique strongly depends on what kind of material you are working with, and what configuration the whole structure will end up with. For example, when erecting a block house on top of a concrete foundation, you can, after waiting for the concrete to harden completely, simply cover it with a bar around the perimeter, pulling it with brackets, or nail the bases of wooden walls to each other, creating a girth. So that the structure does not tilt and takes a final stable position, you can screw the internal supports to it, which will lie on the concrete slab without being attached to it, and will allow the outer part of the frame to hang vertically, covering the slab from the outside.
Such approaches are relevant in all cases when an attempt to fix a wooden part of a structure by drilling threatens to significantly damage the structure of a porous material like aerated concrete. You can put the floor on the balcony without attaching it to the base in any way, but simply adjusting it clearly to the outline of the free space.

In all other cases, when concrete or expanded clay concrete blocks have to hold the weight of a vertically located or suspended beam, it is necessary to install it with mandatory attachment to the base in one way or another.
Mounting methods
The specific method of mounting a beam on a concrete base strongly depends on which part of the building is being worked on. To get the most complete picture of the upcoming work, we will consider all the options in detail.

To the foundation
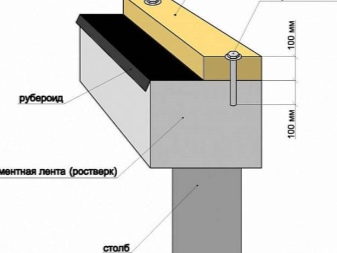
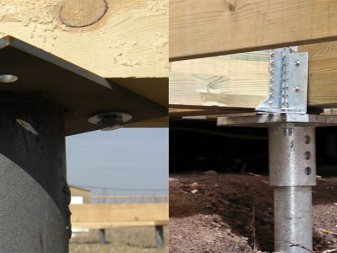
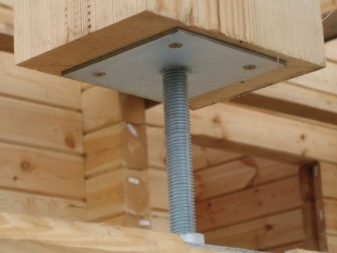
Most often, the fastening of wooden structures to a concrete foundation is carried out during the construction of a log house. The most obvious method of fastening is anchor rods, which are attached to the reinforcement even before it is poured with concrete, and after hardening, they remain sticking outward, representing a ready-made fastener. This method is good in that it does not suggest drilling concrete, which means that it does not threaten its integrity. When the foundation hardens, casing logs are attached to the studs, in which special holes are drilled in advance at the proposed connection points. For full fixation, the log should be additionally attached to the hairpin with nuts and washers.
Installation on anchor bolts is carried out by drilling holes for dowel-nails with a perforator. To ensure that the holes in the log and the concrete base are perfectly aligned, the casing should be held in the planned position and drilled only at the same time as the concrete - never separately. After the hole is formed, the details of the future building are immediately fastened with a dowel-nail.The disadvantage of this method is that the dowel joint is a mandatory hole in the waterproofing layer, albeit a small one. It is hardly worth reminding that wood tends to deteriorate quickly in humid conditions.


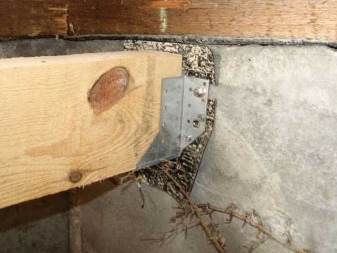
The metal corner helps not to touch the concrete slab and reliably fix the wooden structures being erected, but then it is necessary to fix it inside the building. On a strip foundation, a log structure can be held even under its own weight, without specific fastening, but this is only if it is relatively light. The method is good for the ability to replace rotten logs, but it is not suitable for a frame structure on a columnar foundation.
In the latter case, the solution to the problem will be fastening to a grillage - a wooden lattice that encloses the piles. She herself is attached to the piles by means of reinforcing rods - thick metal rods that are embedded in the pillars during the construction phase. In this case, holes are marked on the beams and holes are made with which the grillage is put on the rods.


If the rod sticks out from above after mounting the grillage (which is desirable for a stock), its top is cut off with a grinder after mounting the grill.
To the concrete floor
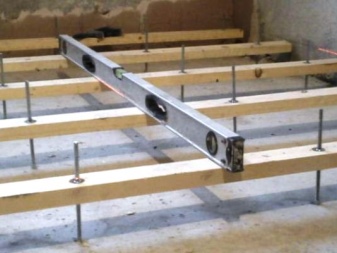
A 50X50 mm beam is actively used for the construction of a batten over a concrete floor. When creating it, the logs should be located with a step of 50–70 cm, depending on the expected load. Their fastening to the floor is carried out by through drilling the holes for the anchors. The anchor bolt must be inserted into the pre-supplied metal sleeve. After that, the lags are forced to be horizontal, propping them up from below with pieces of fiberboard, and the free spaces under the beams are filled with polyurethane foam.

To Wall
Installation of timber to concrete is possible even in a situation where you just need to fix the plinth. If everything is in perfect order with the walls, and they boast a flat surface, you can even solve the problem with glue. However, it should be borne in mind that dismantling during subsequent repairs will be problematic.
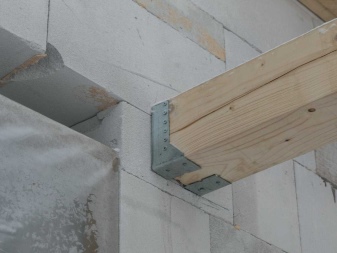
With perfectly flat walls, another method of fastening is acceptable: on corner brackets. Their installation is carried out on plastic dowel nails, so concrete will still have to be drilled. However, this will not be visible from the outside, because the plinth will snap into place on the bracket and completely hide it from prying eyes. In this case, any unevenness in the wall will be noticeable immediately.
Installation with dowels requires special care, because splitting a thin cobbled plinth is a simple task. Making a hole in the plinth is done by countersinking; ideally, the diameter should be precisely adjusted to the diameter of the fastener head. So that the self-tapping screw is not visible after the completion of the work, it is usually sealed with a decorative plug. You can buy it in the same store where the skirting board was purchased. Alternatively, a putty can be used, but this method will complicate future dismantling.
One of the rare ways to secure a skirting board is to nail it down. The latter will not enter the concrete, so the slab is first drilled with a victorious drill, and the holes are filled with wood corks - we will nail the plinth to them. As in the case of dowels, the plinth beam requires careful processing: holes are drilled in it in advance and countersink is made, and upon completion of installation, the heads of the fasteners are hidden with plugs.
If the skirting board does not bear any special load, then the assembly of the battens over the concrete wall, whether inside or outside the building, is already a task that requires more solid fastening, even if light finishing materials are attached over the lattice. In this case, the dowels are considered the optimal and practically uncontested version of fasteners, and the longest ones - due to the presence of a thick layer of plaster in old buildings, they will have to be screwed in at least 4 cm deep.
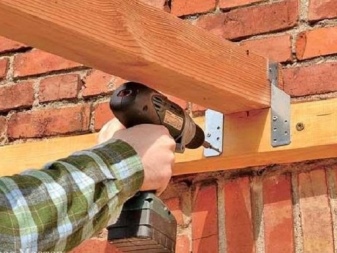

Today, there are dowels that no longer require a plastic sleeve to screw in - they can be screwed directly into brick or concrete. You can identify such fasteners by an asterisk instead of a cross on the head. In most cases, they are designed for a hole with a diameter of 6 mm, but experienced builders say that a 6.5 mm drill will help much more, otherwise the fasteners simply cannot be screwed in.
The crate mounting technology remains classic and does not imply any innovations. The beam, planned for installation, is applied to the wall and its position in level is verified, after which they begin to drill the wall right through it.
After that, a plastic sleeve is inserted inside (if needed) and a self-tapping screw is screwed in.


When installing the roof
A separate technology is the fastening of a wooden roof or Mauerlat over wooden walls. Regardless of the weight of the structure, it must be borne in mind that it is regularly exposed to the wind, therefore it must be fixed as reliably as possible, avoiding displacements and especially falling.
The most obvious mounting option is anchor. It is suitable not only for installing a roof, but also for fastening any kind of lathing to the ceiling, even a heavy one: from a beam of 100X100 mm. As in the case of fastening such structures in any other position, drilling the hole for the anchor is carried out through the through method, with the preliminary application of the Mauerlat or separate lags. For fastening, usually metal sleeves are used, which tend to expand at the end as the nuts are screwed into them.


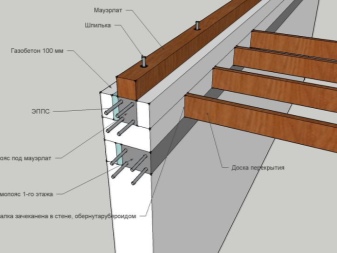
If the house is just being erected, it is reasonable to put studs in the structure of the walls, which will perform the function of fasteners and allow you not to drill concrete. The studs are attached directly to the reinforcement even before the concrete is poured, while they are made with a decent margin of length: ideally, they should extend by 4–5 cm from the native concrete slab, and even beyond the planned beam. This approach allows you to put 2-3 layers of roofing material between the concrete and the Mauerlat for reliable insulation, and only then attach the timber itself. So that the insulating material is tightly pressed, there are no cracks and wobbling, the whole structure after assembly is screwed on with nuts and washers.
There is also an option with a wire, which, despite its seeming primitiveness, is used quite intensively. The technique is very similar to fastening with studs: using a wire with a diameter of 6 mm, the bar is simply screwed to the concrete base.
At the same time, it is important to correctly calculate the number of such connection points so that they are able to support the weight of the structure.


Possible mistakes
In construction, it is important to avoid mistakes that can adversely affect the strength and durability of the structures being erected. In the case of attaching a bar to concrete, pay attention to a few mistakes that must not be made.
- The diameter of the hole for the plastic sleeve should never exceed its own diameter. If your tools give a large error, you just need to take a drill 0.5 mm thinner.
- Kinks in the hole are highly undesirable. Half the sleeve should enter the hole easily, and only then it can be finished off with a hammer.
- The self-tapping screw must be sunk into the concrete by at least 2 cm. Please note: specifically into concrete, not just into a wall! The thickness of the plaster, which is not a reliable base for fasteners, can also reach 2 cm, so the total depth of penetration of the self-tapping screw should ideally start at 4 cm.
- The self-tapping screw must be much longer than the plastic sleeve with which it is used. The calculation formula is quite simple: the length of the sleeve is taken, the thickness of the attached bar and 10 mm in reserve - the sum of all these values is the recommended length of the fastener.
- It is necessary to drill the wall to a depth that is at least 2 cm longer than the length of the sleeve used. In order not to go too far, you can mark the normal depth in advance with a bright felt-tip pen on the drill. Keep in mind that the sludge in the hole interferes with correctly assessing its depth, so it is advisable to remove the dust in a timely manner with a vacuum cleaner.
- The diameter of the self-tapping screw is selected individually depending on the wall thickness of the sleeve - the latter should not roll up following the screwed-in fasteners.
For attaching the timber to concrete, see the video below.


The comment was sent successfully.